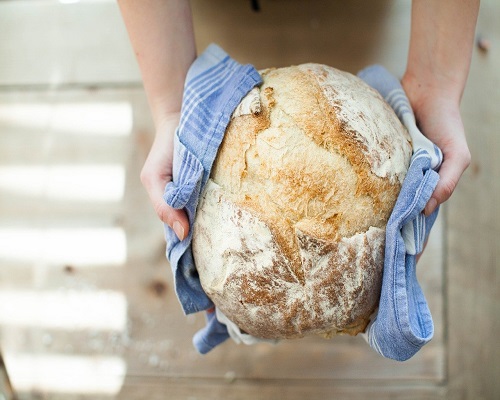
Baking Homemade Bread With A Child

12 Steps to Making Any Kind of Bread with a Child
With more and more families stockpiling, supermarkets shelves are left bare. For this reason, its becoming more popular for families to make their own bread. It has also become a popular pastime activity to do with a child or several of your children. Baking bread is also a great educational opportunity to teach kids a little science. And of course, the fun part of baking bread is eating it.
Homemade bread is delicious and fresh, and while the preparation process is lengthy, it is not nearly as difficult as most people think. Lets get you started on learning how to make your own bread.
First, you’ll need to gather the basic ingredients you will need to make bread, which, based on your bread recipe, will include some of the following items:
Flour
Yeast
Baking Powder
Water
Sugar
Salt
Oil
These ingredients are your basic shelf staples which you probably already have stocked in your pantry. As a bonus, the average price of flour, yeast, baking powder, sugar and salt cost between $2-5 dollars each, making all the ingredients you will need incredibly inexpensive.
Easy Homemade Bread Recipes
There are endless varieties of homemade bread recipes available to choose from, including many favorites a child would love to make.
Here are a selection of classic breads, sweet breads, savory breads, yeast breads and quick breads to bake with a child. You’ll find that these are simple and fun bread recipes you and your family will enjoy.
Jamie Oliver’s just two ingredient bread, here
Homemade buttermilk bread recipe, Here
Trisha Yearwood’s homemade corn bread Recipe, Here
Quick Yeast Bread, Here
Pumpkin Yeast Bread, Here
Paula Dean’s Cinnamon Rolls, Here
The Pioneer Woman’s Monkey Bread, Here
Apple Cinnamon Bread, Here
Betty Crocker Banana Bread, Here
Once you have decided on a recipe, you’ll need to get your baking supplies ready. Here is what you will need.
Bread Pans. You can use glass, ceramic, metal or cast-iron pans. Choosing the right pans for the type of bread you are baking will help the bread to bake evenly and allow for easy removal after baking.
Bowls. You’ll need a bowl to mix your ingredients in and another bowl to rise your bread dough in.
Mixer. Mixing your is quick and easy when done in a mixer. Of course, you can also mix your bread dough by hand.
Thermometer. Close to the end of baking you will need to check to see if the bread is fully cooked.
Pot Holders. These are a must have, especially for the safety of a child.
Making bread at home can be time consuming, but if you plan ahead, you and your family can have nutritious, home-baked bread all the time. The following procedure can be used with virtually any bread recipe.
Step 1: Scaling
Weigh out your ingredients, don’t measure by volume. Think of baking as chemistry. The ingredients all react to one another and need fairly exact measurements to work.
Step 2: Mixing
The best thing about yeast breads is that you only have one mixing step: throw it all in a bowl and mix with a bread hook or by hand.
Step 3: Fermentation
Lightly grease a large bowl and set your dough inside. Cover with plastic wrap and store somewhere slightly above room temperature (on top of an in-use oven or near a radiator) for at least an hour or until the dough appears to have doubled in size.
Step 4: Punching
Don’t worry, it’s not as violent as it sounds! Punching just means to work the dough a little to release CO2 and relax the gluten.
Step 5: Dividing
This step is only used when you want to make more than one loaf. If that’s the case, split your dough into equal portions. It’s advisable to weigh them to make sure the baking times are exactly the same.
Step 6: Rounding
Gently round your dough by forcing the outsides of the ball into the center until you have a stretched, smooth surface on the top.
Step 7: Benching
Benching is another form of fermentation. Allow your dough to rest on the counter under a layer of plastic wrap or a towel for 10-15 minutes.
Step 8: Panning
Gently form your dough into the desired shape and place it on a sheet pan lined with parchment paper.
Step 9: Proofing
This is the final step in the fermentation process. You will want to place your dough in a warm environment (90°-100°F) that has plenty of humidity. Professional bakers use a proofing box, but you can simply set your oven to its lowest setting and place a bowl of water on the rack below your bread.
Step 10: Baking
Baking temperatures and times will vary by type of bread, so consult your recipe. Make sure to add humidity to the cooking environment for the first 10-12 minutes of baking. Use the bowl trick from Step 9. The bread is done when the crust is adequately browned.
Step 11: Cooling
Once your bread has been thoroughly baked, remove it from the pan and place it on a cooling rack. If you don’t have a rack, place it on a cool, porous surface such as a wooden cutting board. This step is important, as the bread will continue to set during the cooling process and will get soggy if it cannot release moisture.
Step 12: Storing
After the bread has cooled, wrap it immediately. For bread that will be eaten in the next few days, a layer of plastic wrap will do. For bread that you want to last longer, wrap and freeze.
Hope you have fun baking homemade bread with a child. And don’t forget the butter.


